Emily’s Best of Both Worlds Pie Crust

Emily’s Best of Both Worlds Pie Crust

Written by Emily

My mother put the fear of God in me about pie crust. I only remember her making pie at Thanksgiving and if my memory serves me correctly, it was a “thing”. The pie crust recipe would come out and she would fret over if the consistency was right and if the dough would roll and get plated without an unfortunate event. She would spend hours looking at the baked product wondering if it was going to turn out ok and I would quietly question why this was worth all the anxiety. Ironic that I’m a pie blogger given the years of pre-Thanksgiving strife I witnessed go down in that kitchen.

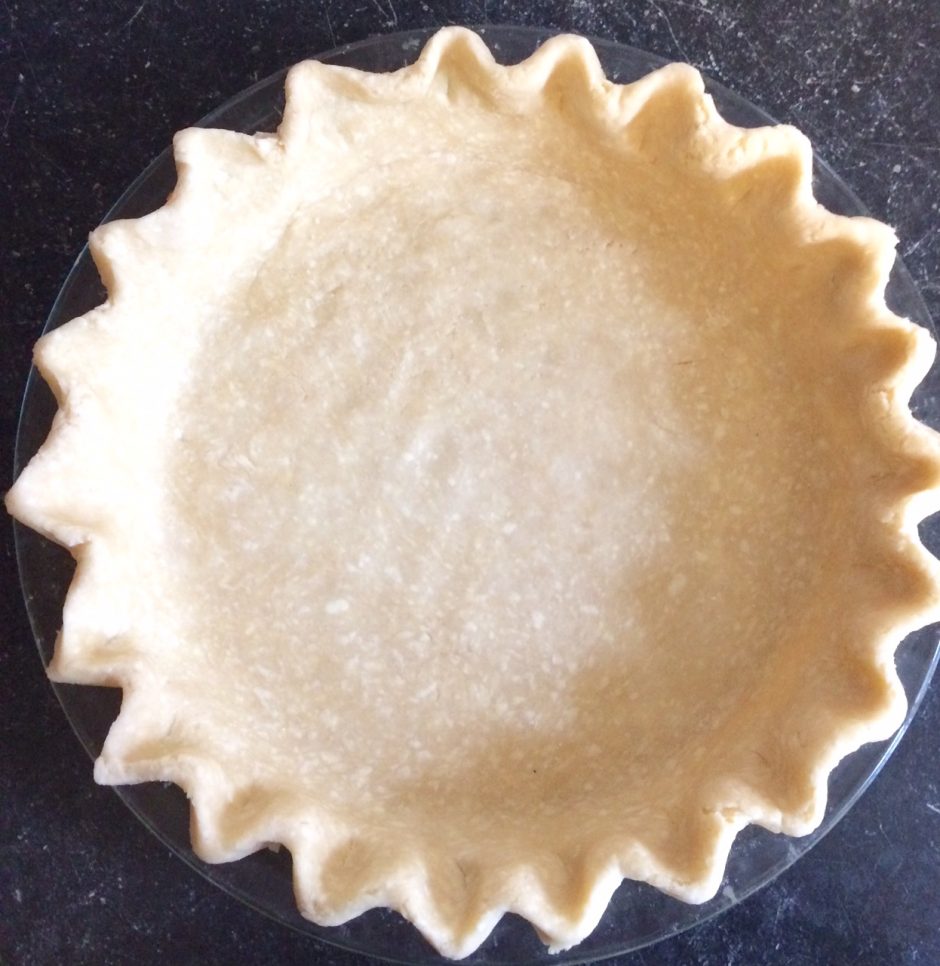
When I set out to learn to make pie, I was determined to take the mystery and anxiety out of it. The first step was learning to make pie crust. And not just any crust, the one that was right for me. If I’ve learned anything throughout the years, it’s that pie crust is personal. Everyone has their opinion about what makes the best crust so I think you should definitely experiment with recipes to find your fit. Years of making pie have landed me right here – MY perfect pie crust recipe. It gets rave reviews and results in a very light and delicate texture. This recipe is also very forgiving, so if you are new to making pie crust, I would recommend this one to start with.

I feel like a sell-out because I have not converted to all butter, but it’s just not the same. I tried all butter, I tried lard and I even tried coconut oil. But this combination delivers exactly what I want in a pie crust. If you are like me and feel guilty that you are using shortening, you can use an organic palm oil shortening like the Spectrum brand. I’ve used that and it does produce similar results. But you will still feel guilty about that too.

Regardless of what recipe you choose, I encourage you to tackle your own crust. I promise it’s not that difficult and I really promise that it will be better than anything you can buy pre-made!

Print Recipe

Emily's Best of Both Worlds Pie Crust

Recipe is for two 9-inch pie crusts.

Ingredients

Instructions

Ahead of Time
  1. Cut butter and shortening into small cubes, place in a sandwich bag or plastic wrap and store in freezer. This is a great step to do in advance and prepare multiple bags to have ready anytime you want to make pie. For some reason, the thought of cutting butter and freezing it is a huge obstacle for me, so this makes my life so much easier!
Preparing the Dough
  1. Place dry ingredients into food processor and pulse a few times to distribute the salt and sugar.
  2. Scatter frozen cubes of butter and shortening on top of the flour.
  3. Pulse in processor for about 1 second each time until the mixture looks like coarse meal. You can take a knife and fluff it around to be sure no large chunks are under the blade. This should be about 6-8 pulses. The mixture will sound chunky at first and you will begin to hear it smooth out when it's time to stop.
  4. NOTE: I have found that a total of 8 tablespoons of ice water consistently does the trick for the right dough consistency. Drizzle 4 tablespoons of ice water over the mixture. Replace the lid and pulse to distribute. Remove the lid again and use a knife to make sure dough is not stuck under the blade and to test the consistency. At this point, the dough will probably look a little sandy still and not quite ready. Drizzle another 4 tablespoons of water and pulse to incorporate.
  5. This is where you need to use your own intuition. You may need to stop at 3 tablespoons or add more. Use your knife to continue to test the consistency and stop when the dough just starts to hold together and come away from the sides a bit.
  6. IT SHOULD NOT LOOK LIKE COOKIE DOUGH. You should still see some crumbles and pea sized chunks of butter.
  7. ALTERNATIVE: You can do this by hand without a food processor. The steps are the same except you are using your hands to incorporate the frozen butter and shortening into the flour. Simply crumble the frozen pieces and rub them into the flour until you have a coarse meal.
  8. Turn the mixture out into a bowl. It will look crumbly. Using your hands, gently pull the dough together into two balls. Place each ball on a piece of plastic wrap or press and seal and cover the top.
  9. Press it into a disc, wrap it tightly and place in the refrigerator for 30 minutes to an hour. This can also be done up to two days in advance. If your dough cracks when you begin to press it into a disc, do not worry. Just continue to gently push it back together - I promise the dough is more resilient than we think!
Things That Might Go Wrong
  1. The dough is too dry and not sticking together - sprinkle more water into the bowl and using your hand or a fork, turn the dough so the water distributes evenly. If you find this out when you are ready to roll, don't worry. Let the dough come to room temperature so it is on the softer side. As you roll, use your hands to patch cracks back together as best you can. Don't worry about all the "rules" about not touching the dough - sometimes you just have to get your hands in there and make it stick together! Even if you have to place the dough into the pie plate in two halves, you're fine. Just piece it together and no one will know the difference.
  2. The dough is too wet - in my opinion, this is the better problem to have. When you are ready to roll, you can pick up extra flour in the dough if you sprinkle in generously on the countertop.

Leave a Reply

Your email address will not be published. Required fields are marked *

Pie Eyed Love on Instagram