Mini Apple Pie Bites

Mini Apple Pie Bites

Written by Emily

I’m feeling the consequences of too much pie. I think I am honestly hung over. It is not news that pie crust is nowhere near healthy – I’m not even going to try to claim the calcium from butter. Ian and I have been eating an average of one mini-pie a day…for the past month. We’re like a pair of bears getting ready for the winter hibernation. I thought the 17 Day Diet was the solution – I would start today, detox, and find the strength to make pie and not eat it. Then Ian suggested that we should just make ourselves sick on pie, then we would no longer want it. So, with a sigh, I brewed some coffee and had a pumpkin mini-pie for breakfast.

I couldn’t let fall pass me by without working on an apple mini-pie. There’s just something about a local apple – I could eat one for every meal. So, this week I embarked on experimenting, eating, and more experimenting.

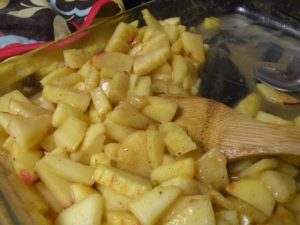
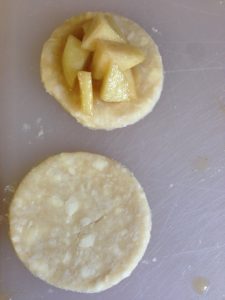
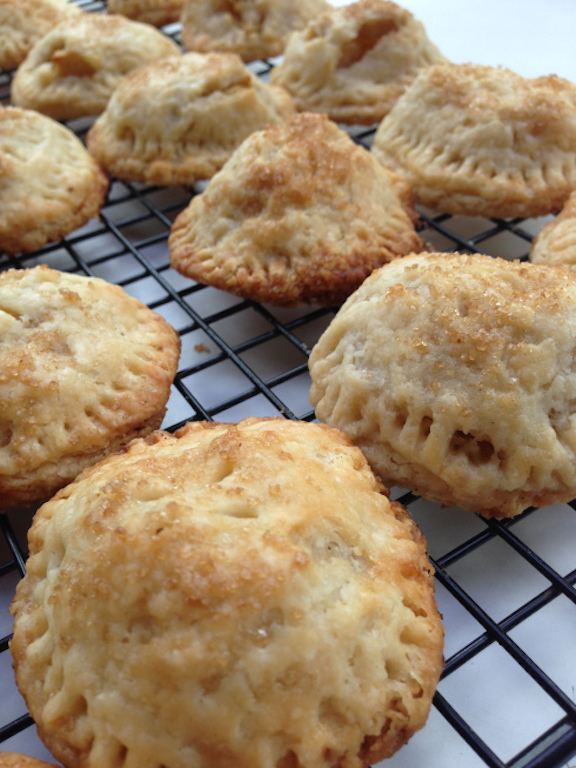
I used the apple pie filling recipe that I posted earlier, but made some tweaks and figured out how to pre-cook it without turning it mushy. Then, instead of glazing like the pumpkin, I sprinkled them with sanding sugar.

Unlike a regular apple pie, the apples need to be cut pretty small to pile into the middle of the little circle.  These were a fantastic treat to have on hand for fall gatherings!


Print Recipe

Mini Apple Pie Bites

Ingredients

Instructions

  1. Prepare pie crust according to directions and refrigerate for at least 30 minutes.
  2. Dice apples into small cubes.
  3. Take 1 tablespoon of the sugar and mix in a small bowl with the cornstarch, cinnamon and nutmeg.
  4. Place apples into a medium saucepan with lemon zest, lemon juice and remaining sugar.
  5. Cook for about 2-3 minutes on medium heat until the apples are crisp, but beginning to soften. Stir the cornstarch mixture into the apples. Cook on high for about 1 minute until mixture begins to thicken. Once thick, transfer to a shallow dish and stir in vanilla. Let cool to room temperature. This step can be done the day before and kept covered in the refrigerator.
  6. While the mixture is cooling, roll out dough and cut 24-26 circles with a 2 1/2 inch round glass or cutter. Place circles on a baking sheet lined with parchment paper and return to the fridge for at least 10 minutes.
  7. Preheat oven to 375.
  8. Remove circles from fridge. Place about 2T of filling into the first row of circles. Experiment with as big of heap as you can put in- the more filling the better. You might have to strategically place some apple pieces. Place another dough circle on top, sealing the edges then crimping with a fork. If sauce oozes out, just wipe it off and keep going. The apples should make a little mound in the middle.
  9. Once all of the pies are sealed and crimped with a fork, given them a good shock in the freezer for about 5-10 minutes.
  10. Remove from freezer. Cut vents into the top in whatever pattern you would like. Brush with milk and sprinkle with sanding sugar. Bake on the middle rack for 25 minutes until golden brown. Remove from baking sheet and place on a cooling rack. To store, cover lightly with saran wrap. Should keep for about 2 days.

Leave a Reply

Your email address will not be published. Required fields are marked *

Pie Eyed Love on Instagram