Raspberry Clementine: Your Bright Winter Pie

Raspberry Clementine: Your Bright Winter Pie

Written by Emily

Winter break had me two steps away from turning into Jack Nicholson in The Shining. The snow paired with the dangerously freezing temperatures squashed my list of fun outdoor activities to do with the family and left me grasping for any excuse to get the kids out of the house (I wanted to stay IN the house without them). I could almost feel my mental state collapsing with every load of laundry I washed and folded…again.

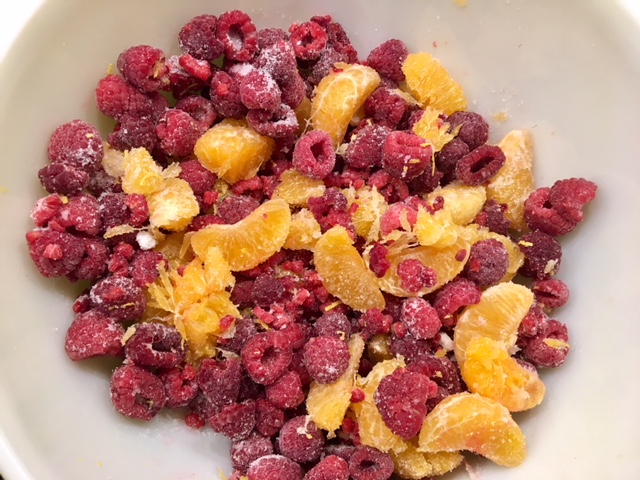
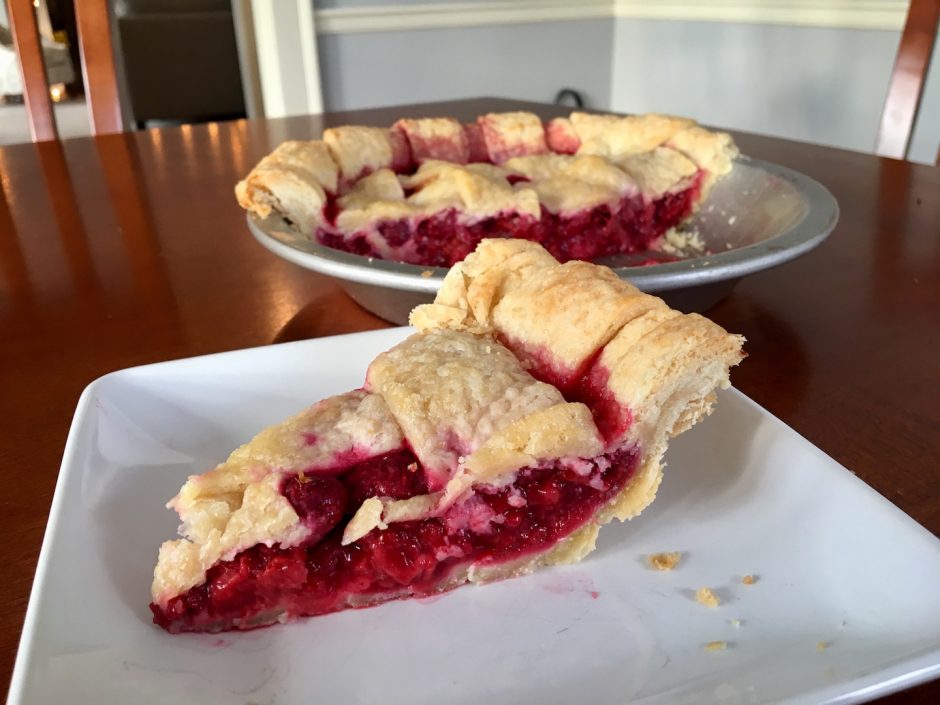
So I coped the only way I knew how and made a pie.  The days had seemed so heavy and dark and I wanted a pie that brightened up my mood.  The problem was, bright things are not in season in the winter.  Except for oranges!  I had a giant bowl of clementines and some frozen raspberries, so I set out to make my bright winter pie.

I had never made a pie with oranges and the internet didn’t have many full-on pies that used orange segments.  I wasn’t sure how this was going to turn out, but it sounded too good to not try.  My laziness prevailed and I decided to see what would happen if I used the clementine segments straight out of the peel. No taking off the thin skins because who has time for that? And it worked!  This pie was delicious and the oranges held up without affecting the texture of the filling. I’m so excited to share this with you because if you need a jolt of bright winter in your life, this is the pie for you!


Print Recipe

Raspberry Clementine Pie

Ingredients

Instructions

  1. Prepare pie crust according to directions and refrigerate for at least 30 minutes.
  2. Preheat oven to 425
  3. Roll one 9 inch crust and plate in a standard 9-inch pie pan. Leave at least a 1/2 inch of dough hanging over the ends and do not tuck or crimp. Cover and return to refrigerator.
  4. Roll the other pie crust to a 12-inch circle and using a knife or pizza cutter, make at least 8 strips of dough. Place the strips on a baking sheet and return to the refrigerator. You can use your own preference for a top crust. One full top crust that is vented, cut shapes or circles, etc.
  5. In a small bowl of ramekin, combine 3 tablespoons of cornstarch, 1 teaspoon of cinnamon and 2 tablespoons of sugar. Set aside.
  6. Prepare the filling by combining raspberries, orange segments, 3/4 cup sugar and lemon juice. Add the cornstarch mixture and combine.
  7. Bring pie dough strips to room temperature. If they are too cold, they will break or crack when handling. You can take these out of the refrigerator before you prepare your filling.
  8. When pie strips are able to be handled without cracking, turn fruit filling into prepared pie shell. Place four pie strips over the top, with the longest ones reserved for the middle of the pie. Continue making your lattice by peeling back every other piece and placing a strip going the opposite direction. There are many lattice tutorials on the internet or you can take a look at Black and Blue pie on this site.
  9. Trim any edges of pie dough so they are even and tuck both layers of dough under. Leave as-is or gently crimp for a more decorative crust.
  10. Brush top of crust with an egg wash (1 egg and a splash of milk) and sprinkle with turbinado sugar (or regular if you don't have any).
  11. Bake at 425 for 20 minutes then reduce heat to 375 and bake for another 20-25 minutes until juices bubble and top crust is golden brown.
  12. This pie is juicy so it needs to cool for at least four hours. The longer the better. Enjoy!

Leave a Reply

Your email address will not be published. Required fields are marked *

Pie Eyed Love on Instagram